Hello!
I offered a free LIVE streaming Paper Mache Workshop March 23 - 26. It was geared to anyone ready to have some fun with this traditional sculpting technique that uses items most of you probably already have at home.
I usually teach adults, but this class is perfect for clever kids or those who have a grown up handy to help them out a bit.
We met 4 mornings in a row on my Facebook page in a live video that are all uploaded below right here on this page (see below) to anyone. Session 3 is optional for those wishing to add a layer of 'paper frosting' to their creation. I am available for questions by Facebook messenger and email.
If you want to discuss your ideas before you start - feel free to email me.
Agenda below. and SESSION VIDEOS embedded below.
Materials list at the bottom of this page.
Paper Mache Info
On this page you will everything you need to know to create your own paper mache sculpture from start to finish.
UPDATE! I am releasing a fully guide to my Paper Mache techniques in late spring 2023. All the info on this page is still valid, but know there's more to come.
During the Covid shut downs I did a free online workshop to give people something to do! The videos below are real-time recaps of those sessions.
Lately I've been lucky enough to be included in some of Meagan Burns' Art Leap Adventure Retreats in Guanajuato, Mexico, where I teach Paper Mache sculpting. Curious? Follow this link:
https://www.artleapadventures.com

Private Paper Mache Workshops in San Miguel
You can have me come to you and your group for some private sessions! At your place or up on Marti's hill in rural San Miguel (Marti can arrange a ride for your group) overlooking the Allende Presa and half of the state of Guanajuato.
Includes:
-
two hands-on sessions
-
all materials provided
-
follow up e-book with comprehensive how-to info
Info covered:
Session 1
-
history of this amazing medium
-
armature basics
-
demos
-
applying the first layers
-
discussion of more options for finishing
Session 2
-
sanding, filling gaps and generally tweaking
-
painting
-
embellishing
$150 per person, minimum 4, maximum 8
Materials Needed HERE
Wheat Adhesive Recipe and Part 1 Instructions - dowload PDF
Paper Pulp Frosting and Clay Recipe
Download PDF


In the videos below, I walk you through the entire process for creating your own unique armature (underlying structure of your piece) all the way through the mixing and application of the paper mache medium on strips of paper ending with painting your finished piece. Create a handmade gift, a decorative piece, or your own unique coronavirus memento!
THE PROMISE: You will learn how to create your own sculpture (about 12” tall is a good first project size) using time honored paper mache techniques.
THE OVERALL EXPERIENCE:
• Tips on how to plan a sculpture
• Demonstration of armature creation
• Info about measuring and mixing the paper mache adhesive
• Info on understanding and how to create a secure armature using easily obtained media.
• Finally, creatives will finish their piece using techniques (bottom and top coat paint) that tie together their original vision with their paper mache structure.


Session 1 - The Armature
Session 2 - The Initial Paper & wheat adhesive Layers
Session 3 - Paper Pulp Fr0sting and paper Clay
Session 4 - Painting
Workshop Participant Progress Pix - Wow!!

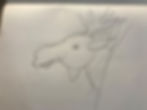
Sketch for Amy's wall hanging moose

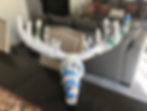
Amy's wall hanging moose armature


Sketch for Amy's wall hanging moose
Materials List
Items needed - PART 1 - ARMATURE
The Armature
-
newspaper (1 small town paper or one section of the NYTimes or similar should do it!) OR any non-glossy craft paper or plain newsprint. Basically any type of paper that will soak up the wheat adhesive slurry
-
masking tape
-
sticks
-
optional wire and wire cutters
-
Scissors, maybe an exacto knife, too
-
optional found forms (bottles, egg cartons, cardboard shapes)
Facebook Archived Live Video here: https://www.facebook.com/HappyArtMarti/videos/508983913111120/
PART 2 - PAPER & WHEAT ADHESIVE
-
Regular, white wheat flour (needs the gluten)
-
Corn starch
-
water
-
vinegar
-
cook pot
-
whisk
-
ladle
-
water
-
stove or cooktop
Facebook Archived Live Video https://www.facebook.com/HappyArtMarti/videos/1113046639032330/
OPTIONAL PART 3 - PAPER PULP "FROSTING"
Items needed for paper pulp 'frosting'
-
1 roll toilet paper (or newsprint torn into bits, Marti will demo in the video)
-
white glue (like Elmer's)
-
drywall joint compound - powder or paste
-
bowl
-
pot
-
hand mixer
PART 4 FINISHING - Painting & Decorating
Items needed
Marti will demonstrate painting techniques
You will need:
-
poster, tempera, watercolor or acrylic paints - flat matte and metallics if you've got 'em!
-
paint brushes
-
water container
-
rags or paper towels
-
optional sandpaper


